

To add custom fonts in Shopify is a straightforward step to make your design more attractive by using custom fonts. Especially when you already have many apps installed and they are slowing down your store performance.
SO, if you don’t want to use the default fonts given by the Shopify customizer, here we have listed some methods to add custom fonts to the Shopify store.
Table of contents
Method 1: By using a Shopify app (Not recommended)
If you don’t want to mess with your store code, installing an app will solve your problem. But as I stated above, it will add a burden to another app and slow down your store loading speed.
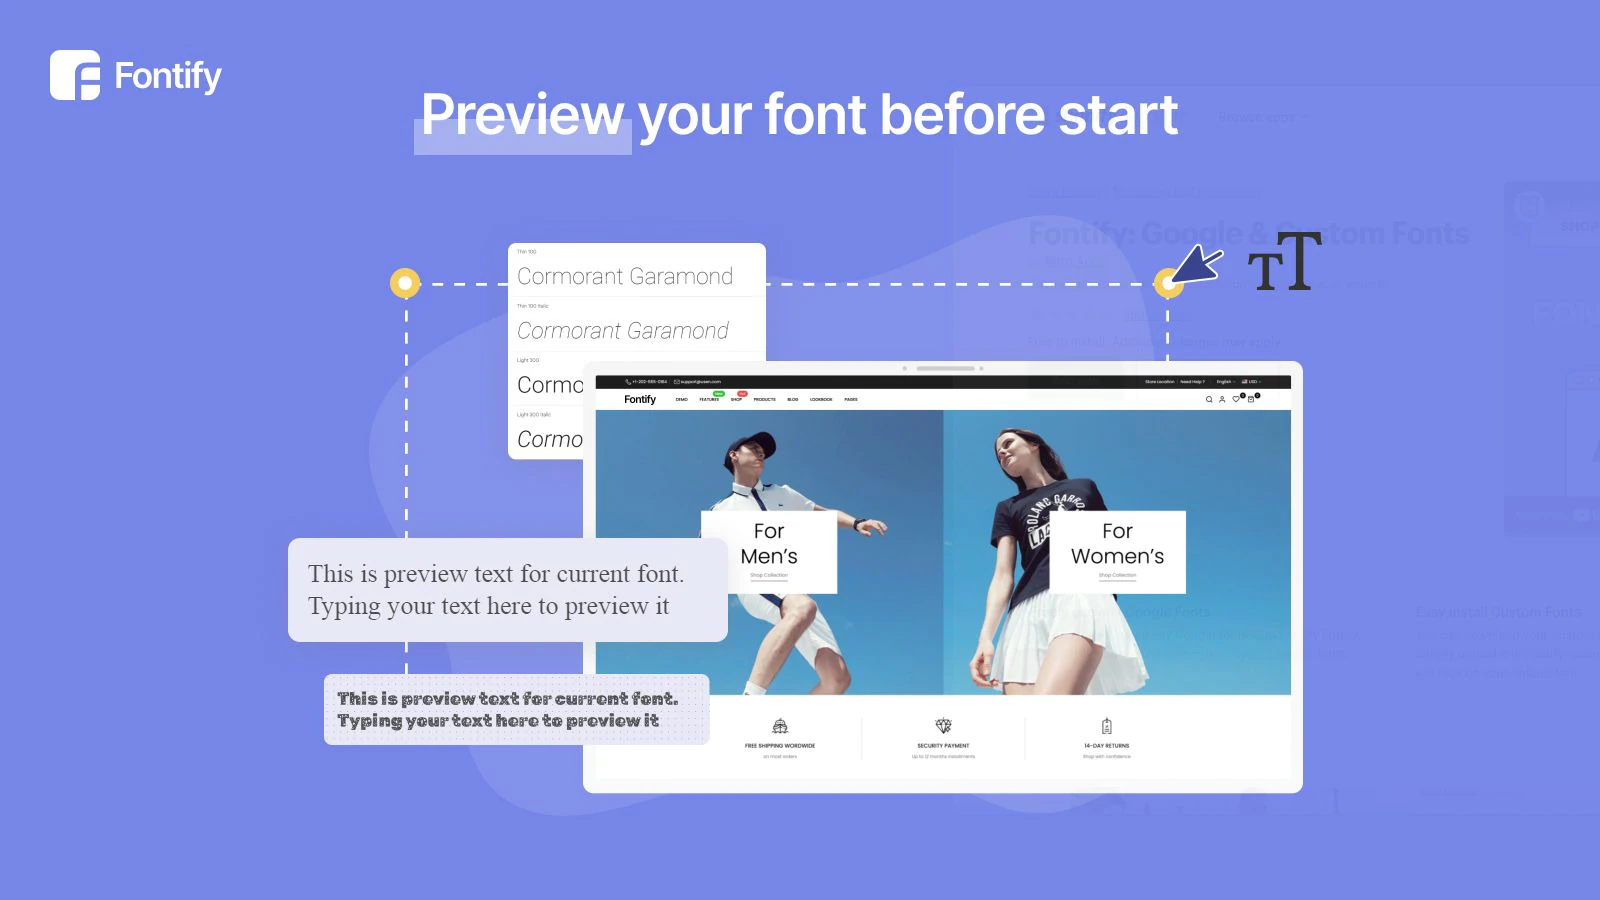
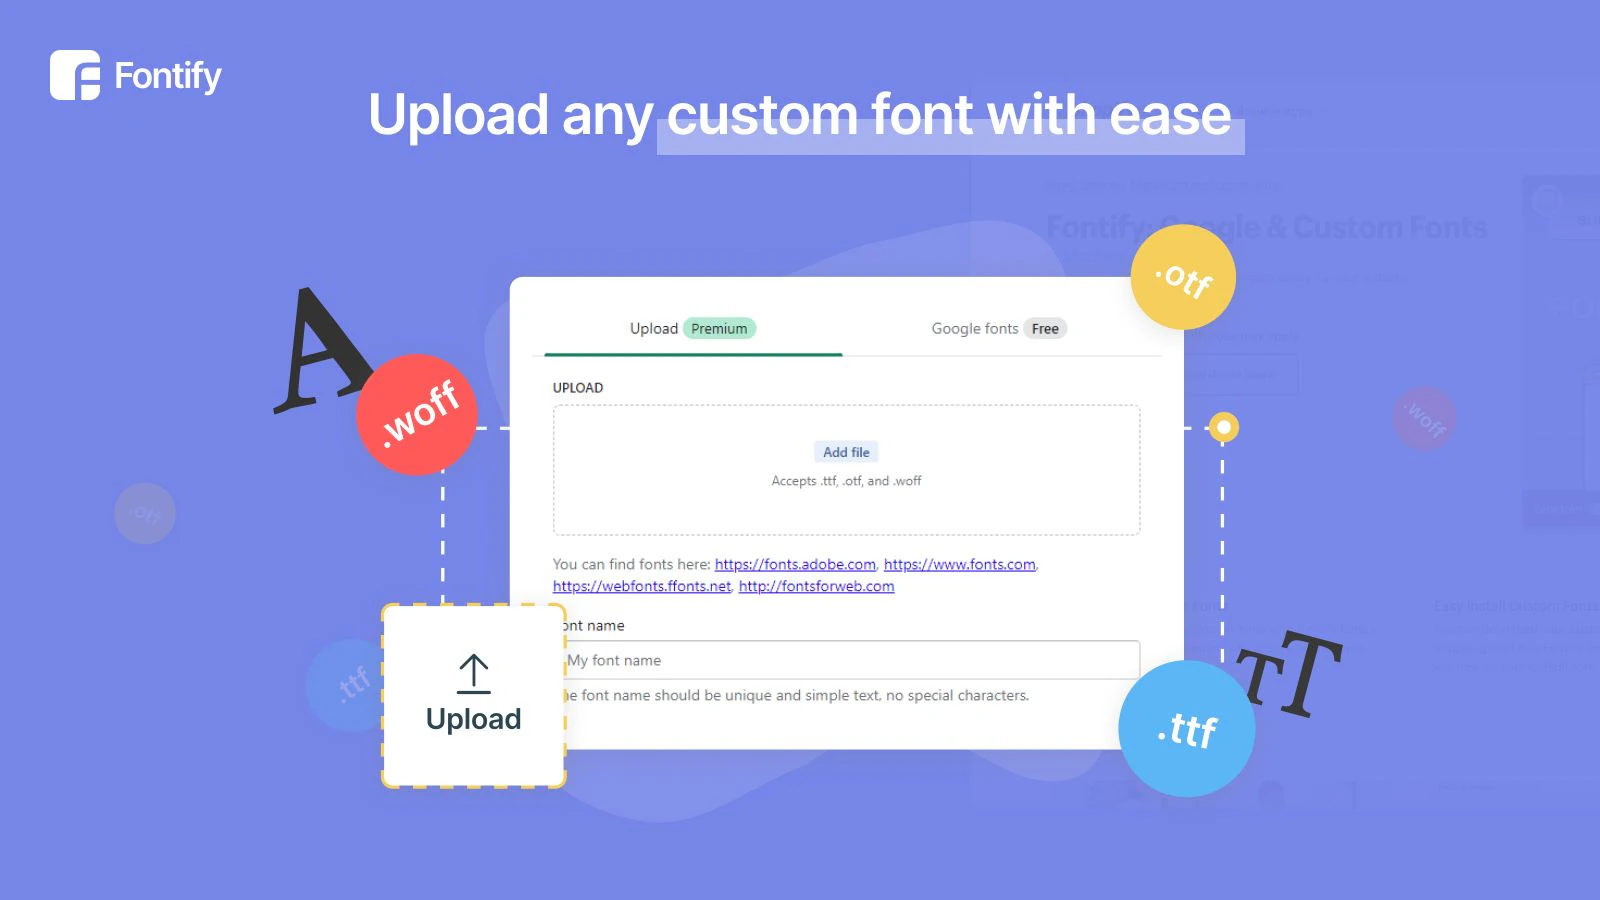
Fontify: Google & Custom Fonts
This app by Nitro Apps allows you to install custom fonts in your store. This is a perfect solution if your store doesn’t have many apps and you are also not tech-savvy enough to jump into custom code.

Fontify allows you to change any Google or Custom font for your Shopify store easily. You can apply specific fonts for different sections of your page or for the whole page.
You can find various stunning fonts in its Google font library. Or upload any branded fonts you already have. This app saves you tons of wasted time & cost to bring a professional, consistent look to your store.
Some highlighted benefits of this app:
- Change any Google Fonts in no time, GDPR compliant
- Upload any Custom font you want easily and quickly
- Allows the font to be applied to the entire site or to a particular element
- Compatible with all Shopify themes & apps: The4 themes, EComposer, etc.
- Support multiple languages (Separate fonts for each language)


Read More About Shopify Tutorials
Method 2: Add Custom fonts in Shopify using code
Before editing the code, make sure to take a backup of your Shopify store. So in case of any problem, you can revert back to the working store.
Step 1: Download your desired font
You can download your desired font from several websites available on the internet like dafonts, 1001freefonts, and fontesk. Go to any of these websites, search for your needed font, and download the .otf, .woff, or .woff2 file. (any one of these)
Step 2: Upload the fonts in the store content files.
Once downloaded, you have to upload the font file directly into the files of your store as you upload images and videos.
- Go to your store admin panel, click content > files.
- Click the Upload files button in the top right corner.
- Select the font file and upload it.
Step 3: Add @font-face CSS to theme code
To use our uploaded font, we have to create a font-face in the theme file. To do this, follow these steps:
- Navigate to Sales Channel > Online Store > themes.
- Click 3-dots left to customize button and select edit code.
- Select theme.liquid from left side bar.
- Add the following code just before the </head> tag.
<style>
@font-face {
    font-family: 'font-name';
    src: url('https://your-shopify-store.myshopify.com/cdn/shop/files/font-file.woff2') format('woff2');
}
</style>
font-name: This is the font name that you can set as you like.
URL: Replace this link with the font file link uploaded in the content > files in the Step 2.
woff2: This is the format of the font file, change it according to your file format.
Step 4: Add font family to tags of your need
You can simply add this code to the theme.liquid file or alternatively in the base.css file. Both will work in the same way.
h1, h2, h3, h4, h5, h6, span, p {
   font-family: 'font-name', sans-serif !important;
}
!important will make sure that this font is applied forcefully to all headings, spans, and the p tags. You can add more tags according to your need to apply this custom font.
Conclusion
Whether you add custom fonts in Shopify using an app or without an app, make sure to check thoroughly on all pages to make sure it is being applied properly. You can also add Google fonts using the @import feature, but that is not recommended.
If you liked this tutorial, comment below and give your feedback. Thanks