Initiating a WooCommerce store can be an intimidating job. There are so many things to ponder, from setting up your shop to adding products and handling your supply.
Gratefully, there is an abundance of plugins and tools to help you get the job done right. In this article, we’ll show you how to add and manage products in WooCommerce, the right way with step-by-step instructions you can follow along with.
Table of contents
- How To Add Products In WooCommerce
- Step 1. Login to WordPress and install WooCommerce
- Step 2. Install WooCommerce Plugin
- Step 3. Add New Product
- Step 4. Add Product Name And Description in WooCommerce
- Step 5. Add Product Data using WooCommerce
- Step 6. Add Product Images in WooCommerce
- Step 7. Add Tags And Categories in WooCommerce
- Step 8. Publish Your Product using WooCommerce
How To Add Products In WooCommerce
Adding products in WooCommerce is a quite simple process, but there are still limited things to keep in mind, here’s how you can start.
Step 1. Login to WordPress and install WooCommerce
Before you add a new product you’ve to log in to your WordPress website, once you log in, you’ll be taken to the WordPress dashboard.
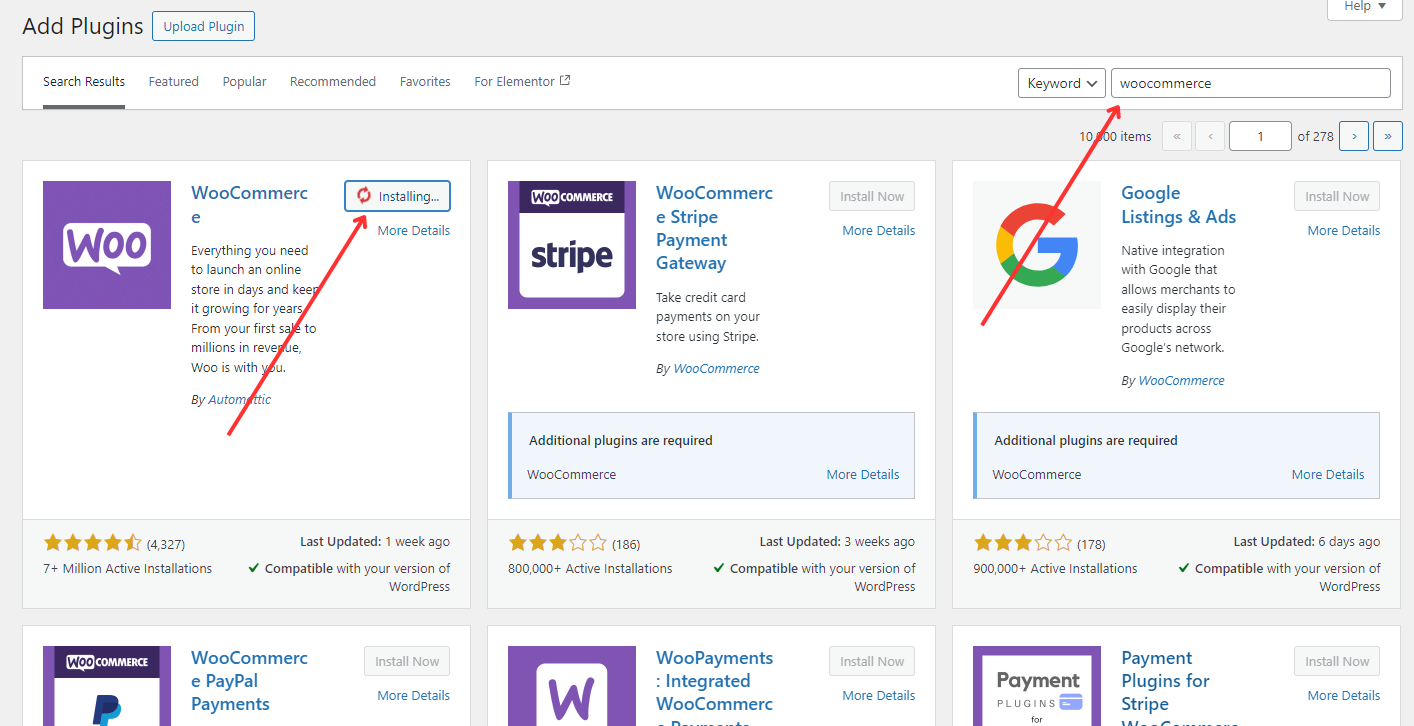
Step 2. Install WooCommerce Plugin
- Go to the plugins section in your WordPress dashboard.
- Click on the add new plugin.
- Search WooCommerce, Click on install then activate plugin.
Step 3. Add New Product
Now you’ve WooCommerce installed it’s time to start adding products.
In the WordPress dashboard click on WooCommerce, on the left-hand side of the screen, under this, click on products>add new product.
It will take you to another page, where you can add information about your product.
Read More About WordPress Here
Step 4. Add Product Name And Description in WooCommerce
The first thing you have to do is add the product name and description.
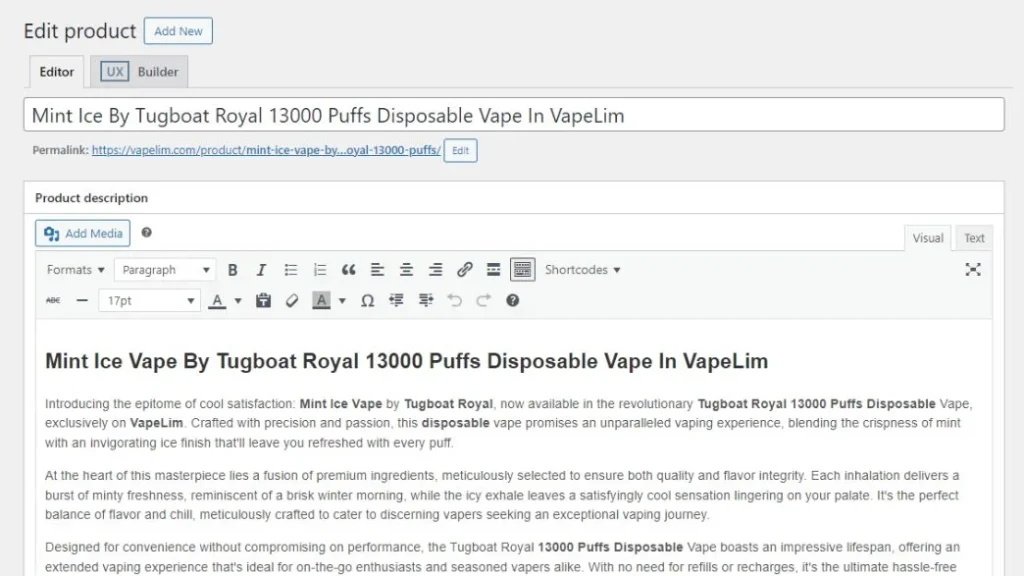
The name will be how your product is listed on your WooCommerce shop page. The description shows where you want to show the details of the product.
You can scroll the page and add a short product description, which will show on the shop page below the product name.
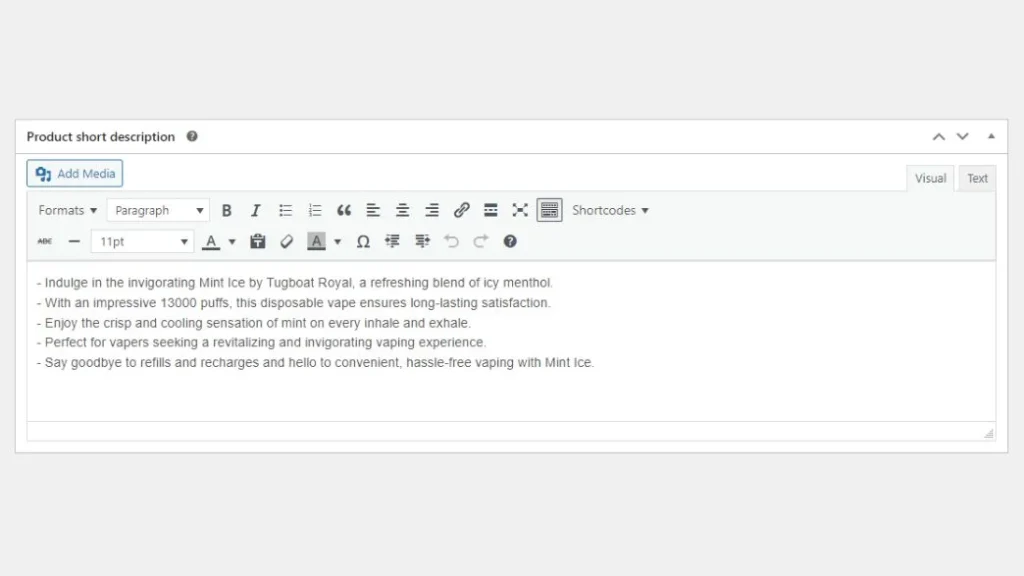
Both the name and description fields have much text editing, so you can add things like headings, links, and lists.
RELATED POSTS
- How to Clone a WordPress Page from Another Website in Easy Steps

- Aesthetic Fonts 10 Pretty Picks to Make Your Text Pop


Step 5. Add Product Data using WooCommerce
Once you add names and descriptions, it’s time to fill out the product data, next, there is a drop-down menu, from where you choose different product types including the given below.
- Simple Product
- Grouped Product
- External/Affiliate Product
- Variable Product
On the right side, you can also tick checkboxes for virtual and downloadable, which you would select if your product is untouchable or can be downloaded after purchase.
Below this, we’ve many options on the left-hand side of the screen, where you’ll add product data information. This Is the most easy process, you just add the information in the suitable regions. But let’s analyze these options to clarify each data point in detail, divided by the sections in which it is contained.
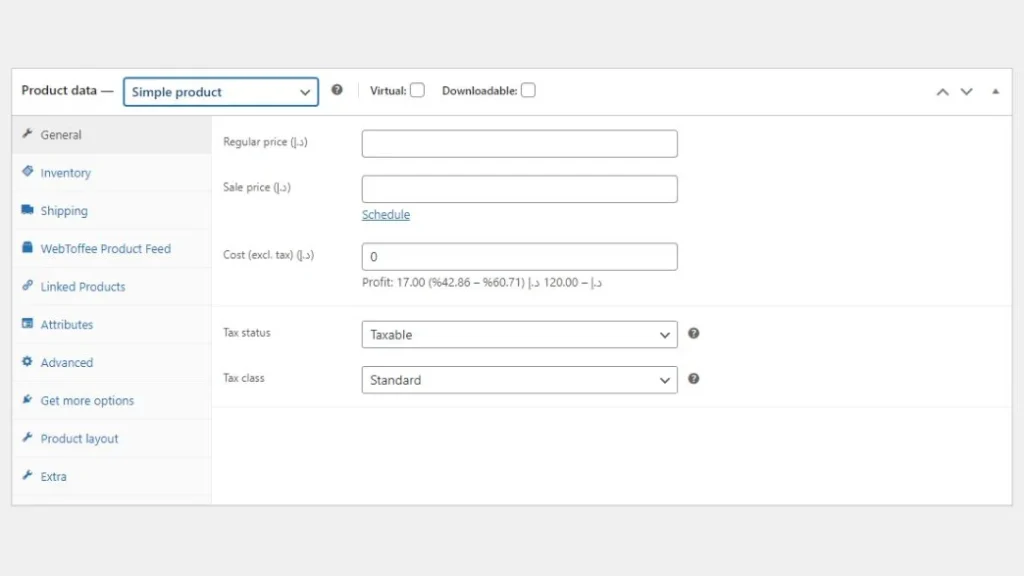
General
In the general section, you can add the regular price and sale price of your product.
Right now if your product is on sale. You’ll enter the regular price in one field and the sale price in the second field. If your product is not on sale, leave the second field blank.

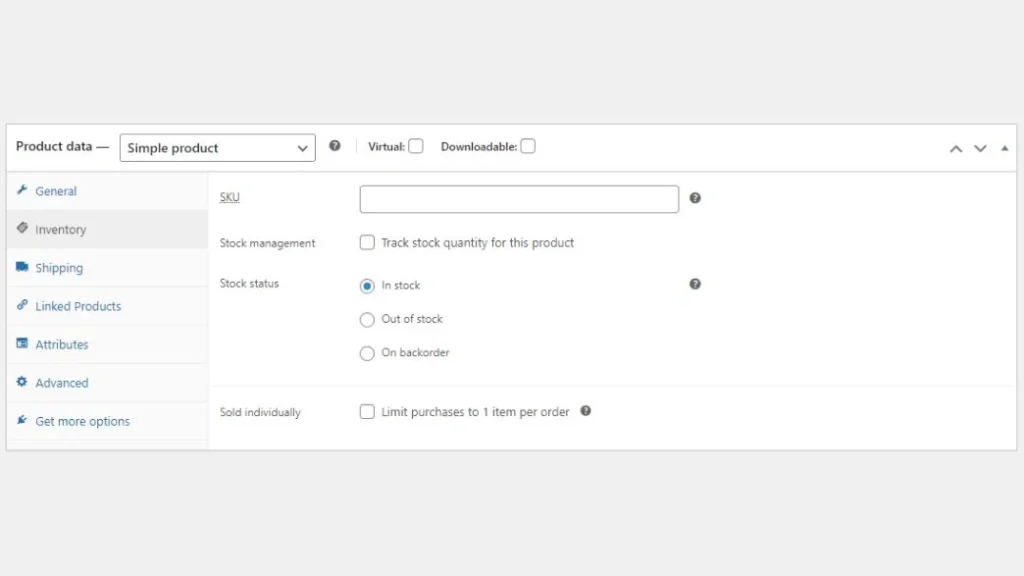
Inventory
In inventory, you can monitor the track stock level of your product, and manage the inventory of the product.
You can also track stock by the variation given below.
SKU
A product SKU(Stock Keeping Unit) is an exclusive indicator for every product in our stock. It’s your choice whether you can add it or not, but if you add it will be written in this field.
Stock Quantity
This is where you add how much of the product we have in stock. If there is no variation in your product, you only put the number here. But if you have variation you need to add the number of each variation.
Allow Backorders
A backorder is when a customer orders a product that is out of stock, if you select the Backorder option, the customer will still be able to purchase that product, and you can choose one option from the following given options: DO not allow, Allow, and But notify customer.
Low Stock Threshold
This is the point at which you receive low-stock notifications.
Shipping
In the shipping section, you can add shipping data, it provides equitable few options automatically.
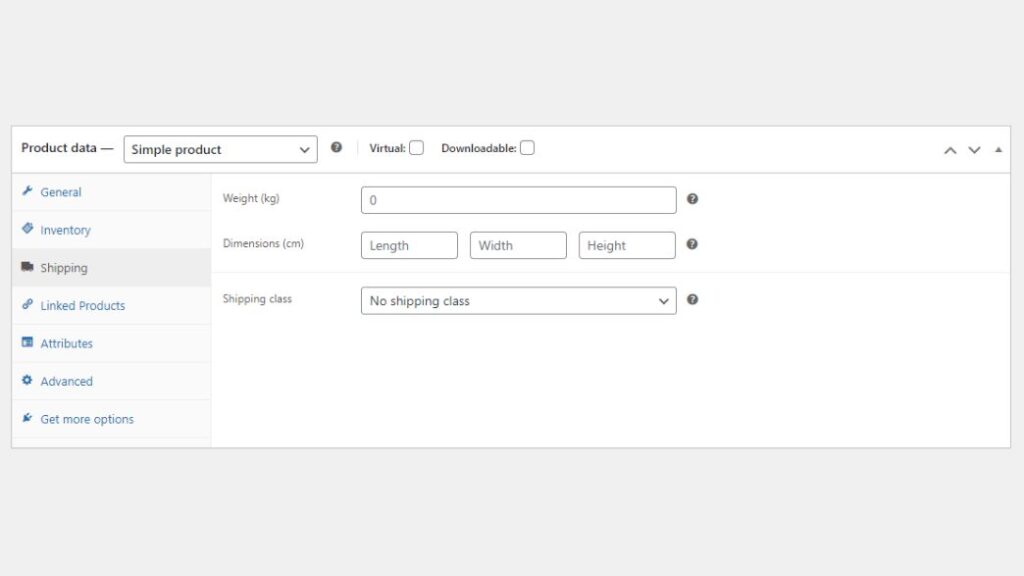
Weight
In weight, you’ll need to add either in pounds or kilograms.
Dimensions
In dimension, you can add product length, width, and height. You have to add these numbers in centimeters.
Shipping Class
It enables you to allocate a shipping class to your product.
Linked Products
In the linked product section you can sell up or side-sell products to customers.
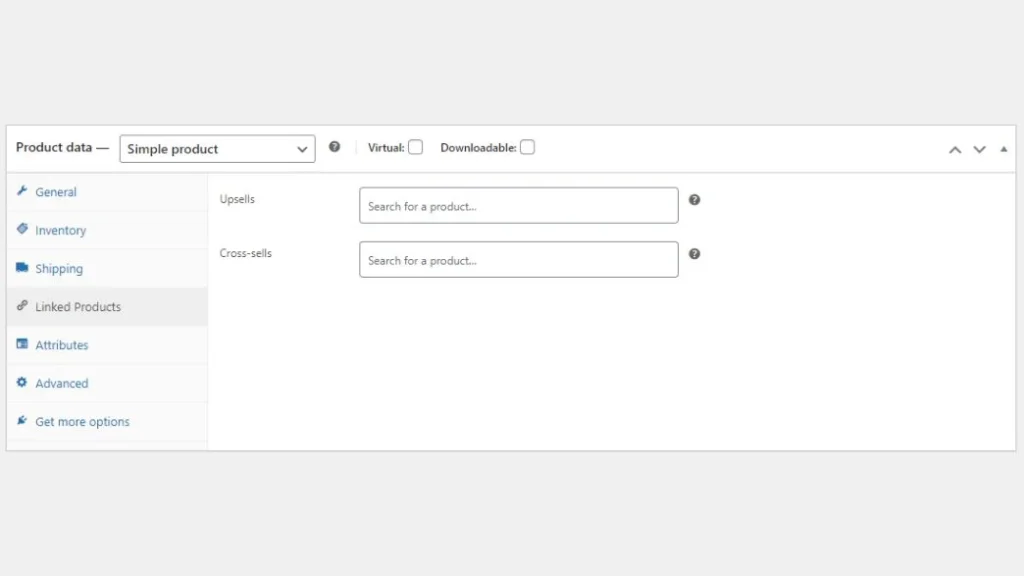
It has two options:
Upsells
It involves that you have a more featured version of the product currently being viewed, you can link to it here.
Cross-sells
You have a product that is complimentary for currently being viewed, to continue with a headphone you can cross-sell a charger.
Attributes
In the attribute section, you can add more pieces of data like color, size, and material.
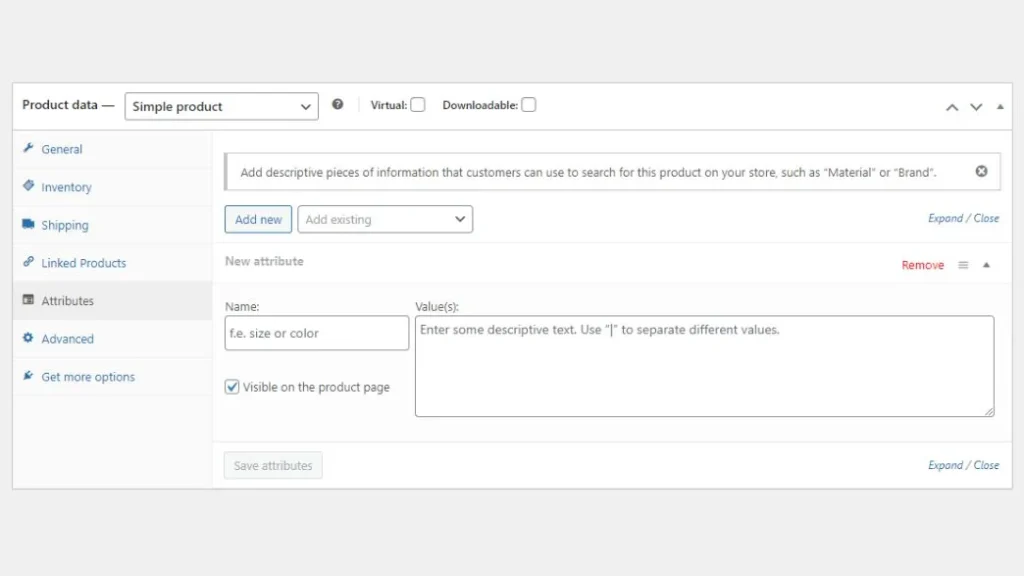
To add attributes click on Add button. A row will arrive where you can add the Name and Value of the attribute, when you’re done click on the Save Attribute option.
Read More About WordPress Here
Advanced
Advanced sections allow 3 options.
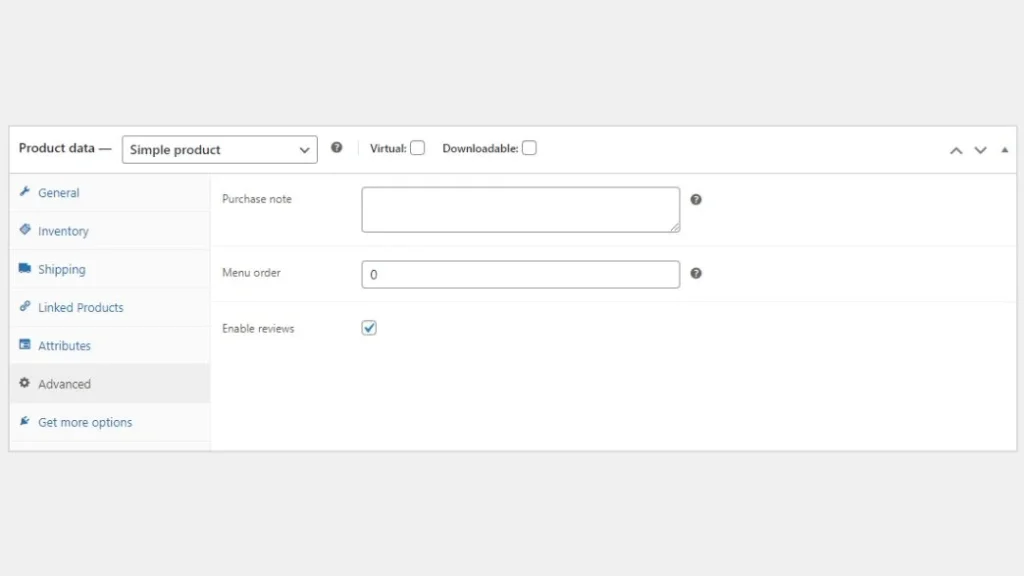
Purchase Note
It is a short message that’s sent to customers after a purchase
Enable Reviews
By checking this box customers can give reviews about the product.
Menu Order
This is the order in which a product appears with another product.
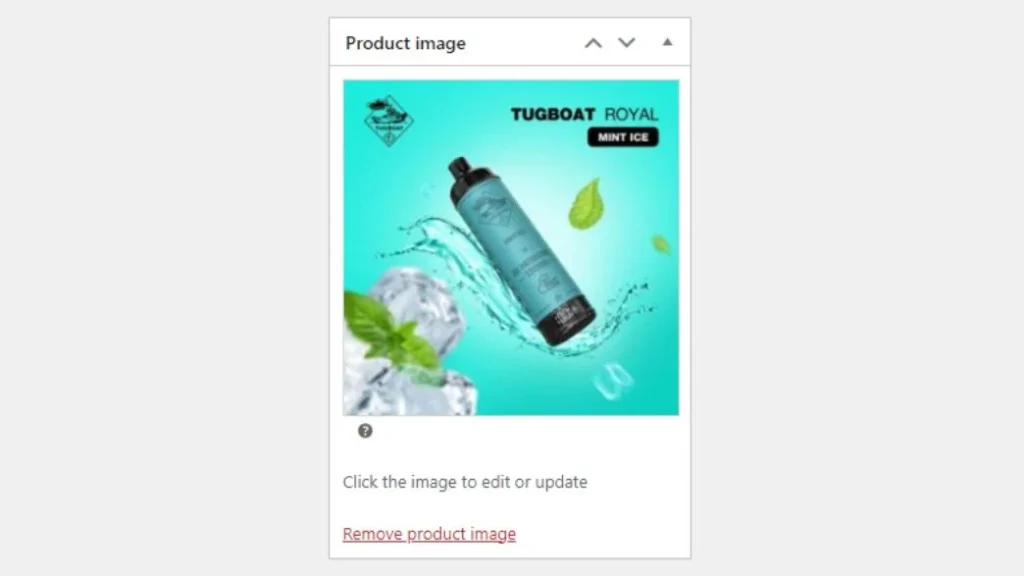
Step 6. Add Product Images in WooCommerce
Product Image
The next step is to add a product image that will appear on the top of the product detail page. Click on Product Image and then upload a file.
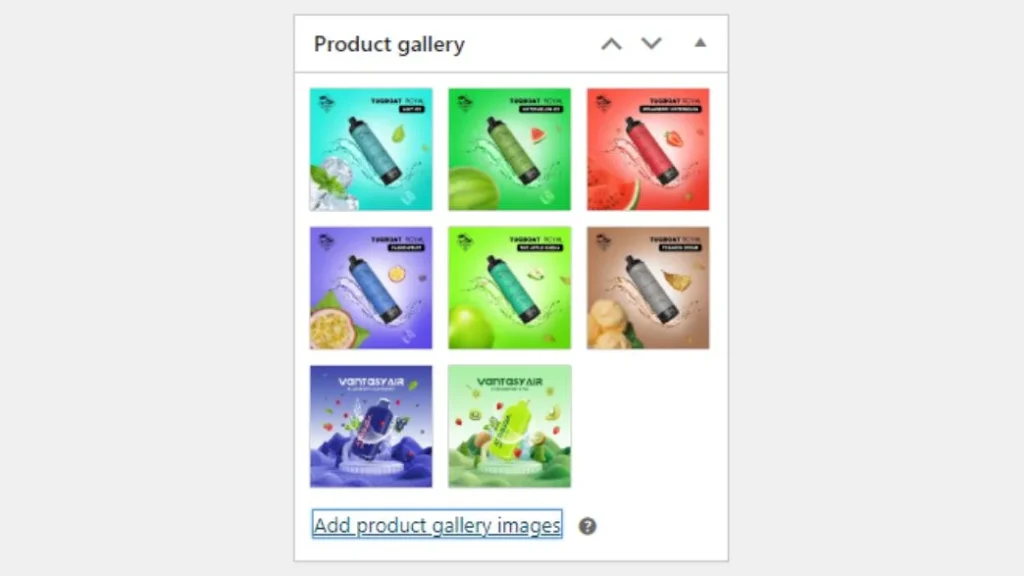
Product Gallery
Product galleries allow customers to view multiple images of a single product. To do this, click on the Product gallery and then Upload images.
Step 7. Add Tags And Categories in WooCommerce
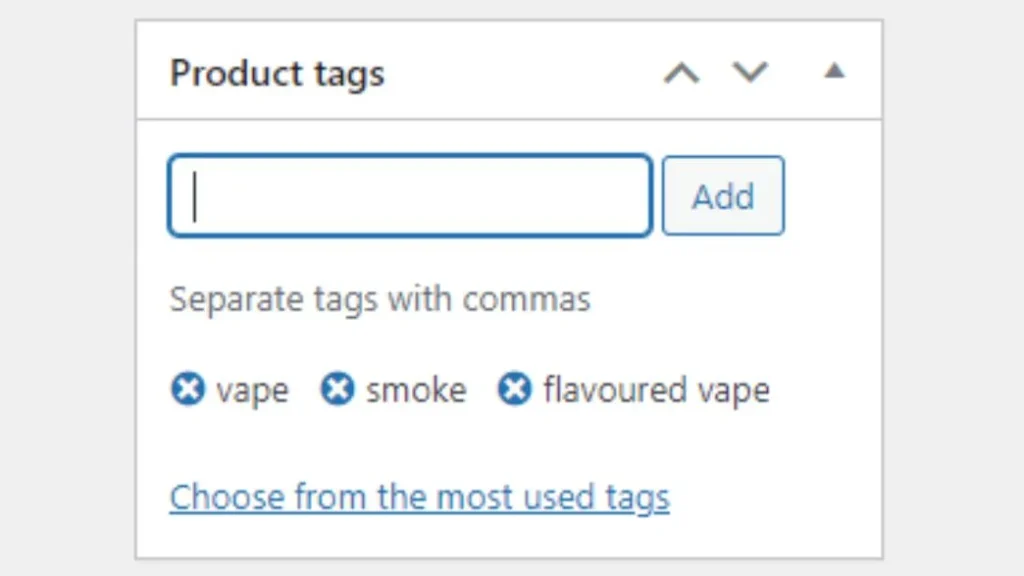
Tags
Tags are used to define products and help customers to find related products on your website.
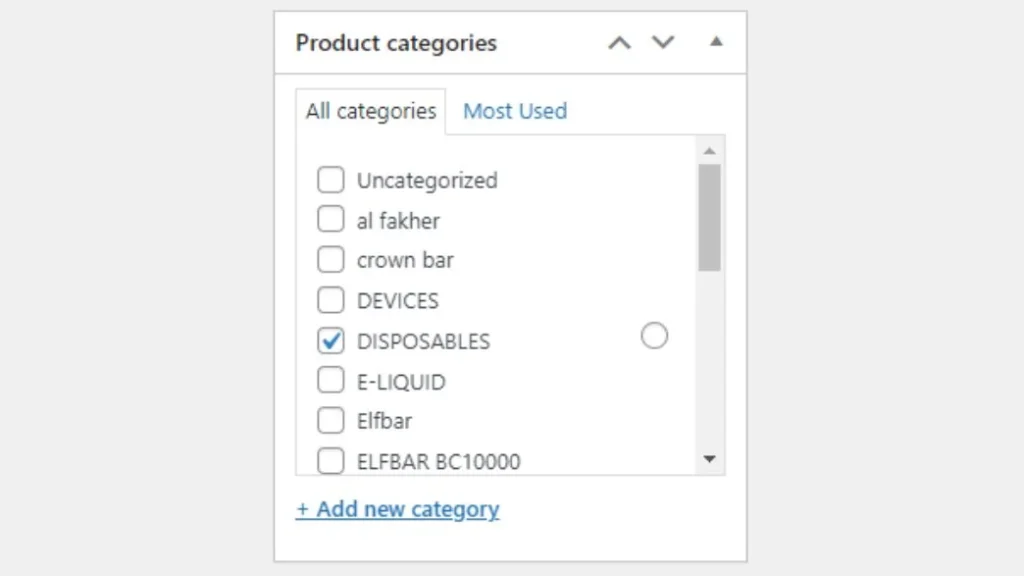
Categories
On the other hand, category is used to group products together.
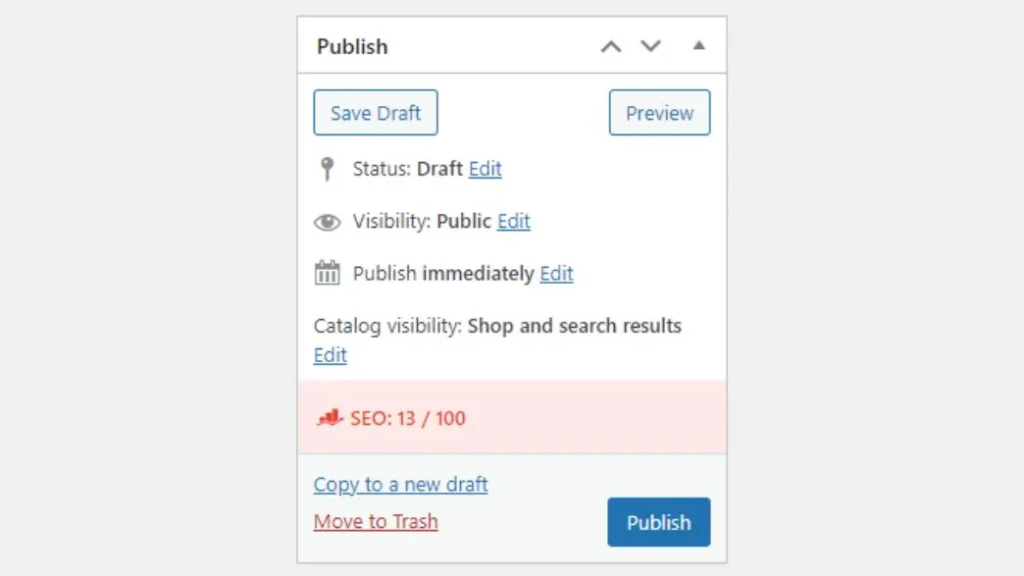
Step 8. Publish Your Product using WooCommerce
Once you finish the configuration, go back to the top left side of the window, there is a Publish option click on the update and your product will be saved.