You can configure any form plugin like Elementor Forms, Contact Form 7, and WPforms with SMTP, just the method will be a little different for each of them.
Sending emails in response to form submissions takes a lot of time when messed up. But don’t worry if you are here to read this guide.
What is SMTP?
Just like HTTP is a “Hyper Text Transfer Protocol” that is responsible for the secure connection of a web server and a client device and TCP/IP is a “Transfer Control Protocol/Internet Protocol” that manages everything related to connections and networks. SMTP stands for “Simple Mail Transfer Protocol” which is responsible for sending emails when someone performs an action on your website or submits any form.
SMTP works as a 3rd party service between the sender and receiver. It takes the sender’s email, message, and some protocol information which includes authentication by the hosting provider. After validating the information, it sends the desired email to the destination.
Learn More About WordPress Here →
This image will clarify the concept of SMTP.
How to Configure WPforms with SMTP?
In this guide, I have selected the WPforms plugin to collect submissions from users, but you can use any form plugin according to your needs. And I am using the HOSTINGER hosting service for my WordPress website as it proves to be the BEST HOSTING SERVICE out there.
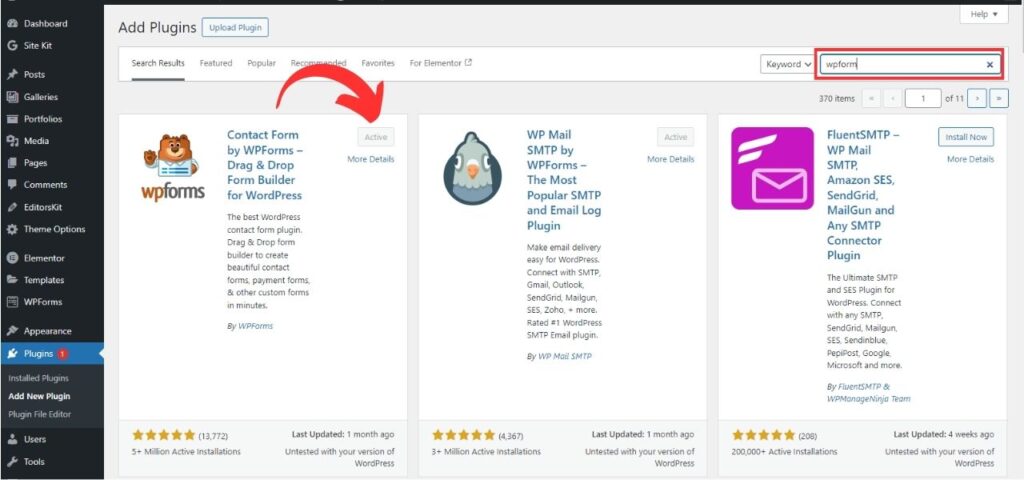
Install & Activate WPforms Plugin
- Go to your WordPress Dashboard
- Navigate to Plugins
- Click Add New Plugin
- Search for WPforms plugin
- Click Install
- After Installation, Click Activate
You can get a quick look at the Logo and the wpforms plugin to be installed.
After Installing the WPforms plugin, we have to create a new form. It can be any type like a contact form, author form, or quote form that you want to be filled out by the visitors. This form will email you whenever someone submits details on your website. Let’s create a new form.
Create a New Form in WPforms
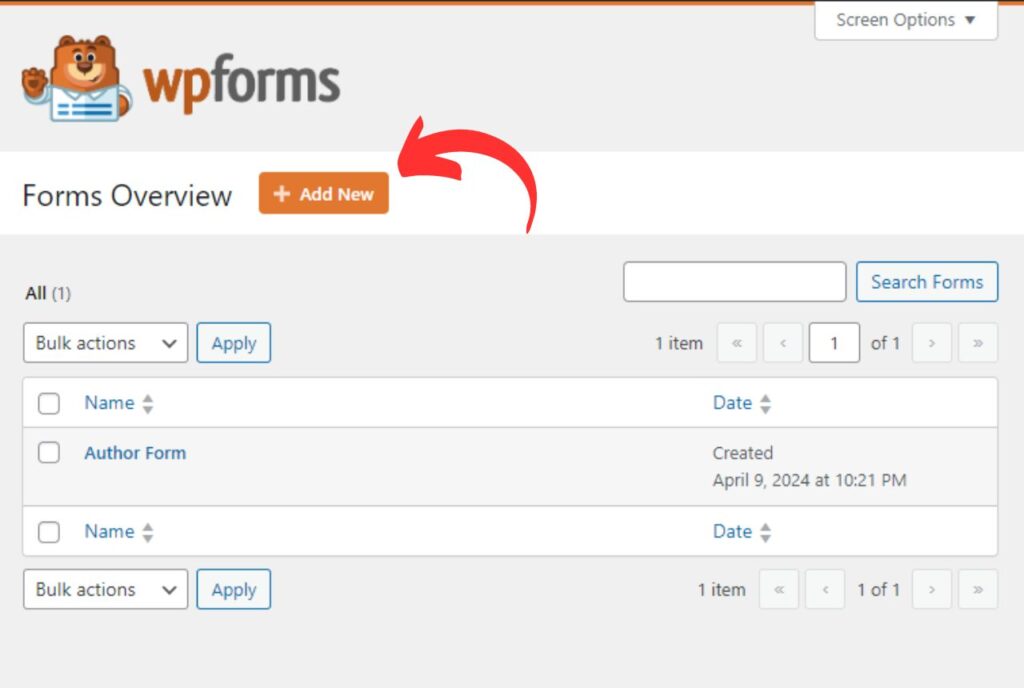
- Go to WordPress Dashboard
- Click the WPforms Menu Option from the left sidebar
- Click Add New Button
- A form Editor will load in front of you.
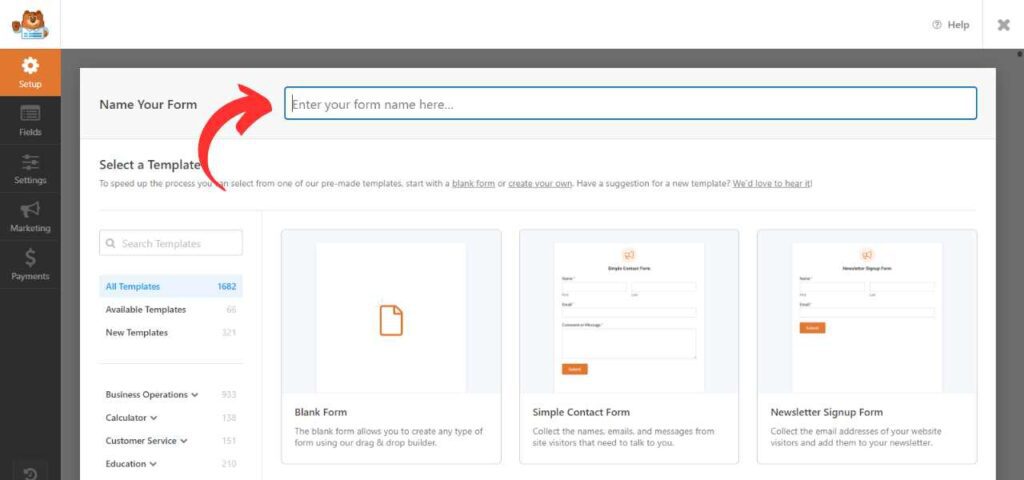
Give your form a Name
Enter a unique and describing name in the top field of the form. You can find several ready-made templates to start from. It will save you time and effort. I am selecting the Simple Contact Form Template for now.
Customize Your Form and Publish
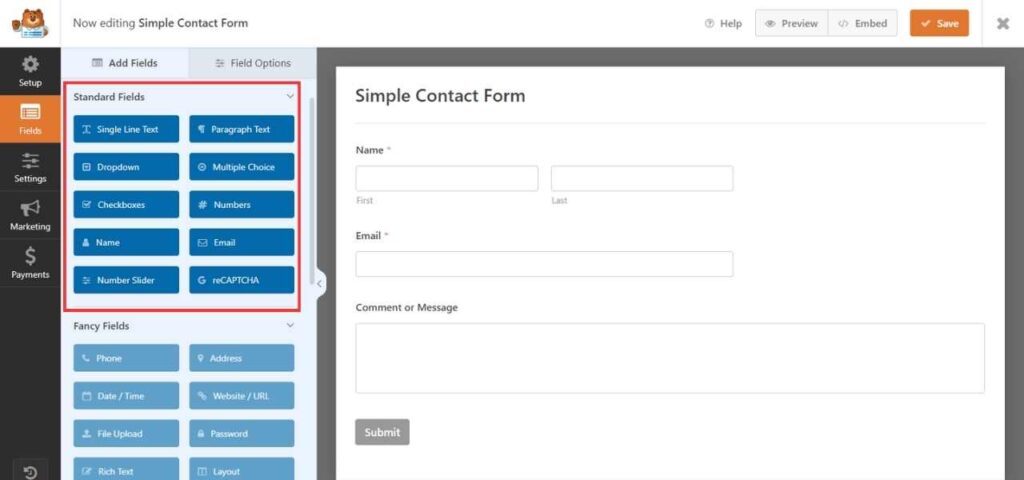
Customize your form with available fields. More complex fields and Logical controls are available in the PRO package of this plugin. If you are just collecting emails, Phones or Names Free Version is enough for you.
After completing the customization, click Save. To preview your designed form, click the Preview Button at the top right corner of the editor. The form will inherit all the styles from the theme of your WordPress website. However, you can customize the form by using custom CSS or JS.
Integrate your form into the Page
After publishing the form, now it’s time to integrate or embed this form into a single page.
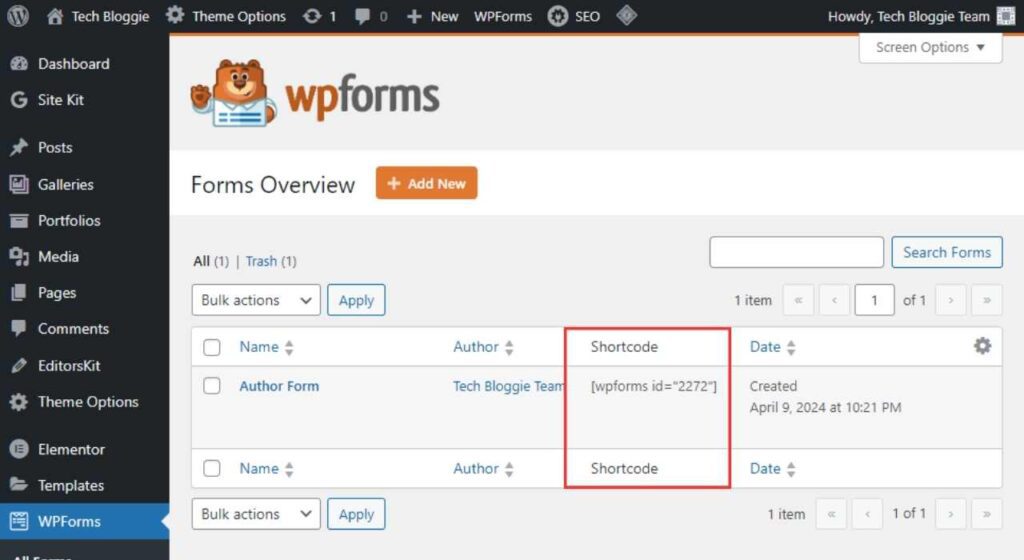
- Copy the shortcode when saving the form
- Go to WordPress Dashboard
- Click Pages
- Click Add New Page
- Name Your Page
- Add New Block by Clicking the + icon
- Search for SHORTCODE
- Insert the copied form shortcode
Your form will appear on the page, click Publish and then view your page to check the form appearance.
⚠️ WPforms doesn’t support Submission Storage
In the free version, WPforms doesn’t allow entries storage which means when a user submits a form, it will be directed and sent to you via email and will not be stored anywhere else. So better to check it twice before rolling it out publically.Now our process for creating and customizing a form is complete. We have to configure SMTP so the form can send us emails without any interruption and we can save the entries in our email.
Install WP Mail SMTP Plugin
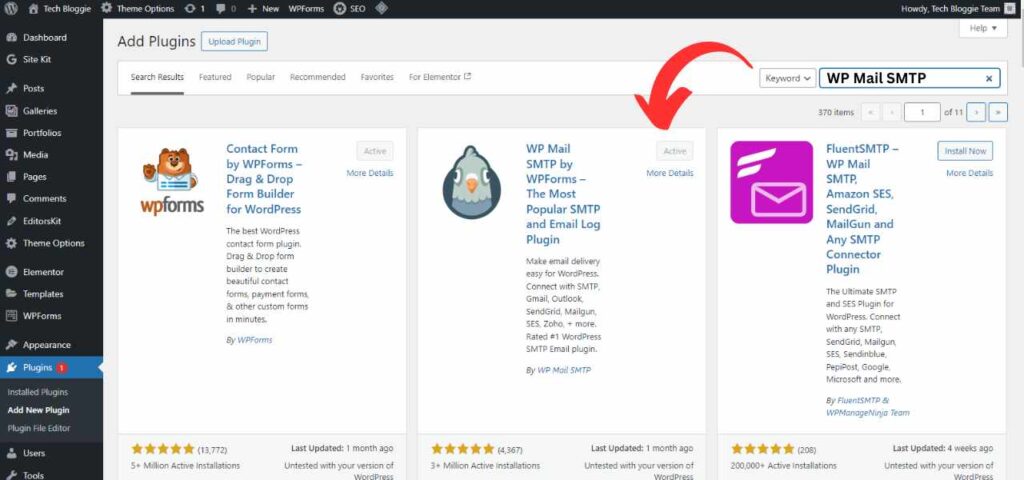
To start sending emails right into your inbox using WP forms, we will use the WP Mail SMTP Plugin. You can use any SMTP plugin, almost every plugin works similarly to this one. So, let’s start making it work.
- Go to WordPress Dashboard
- Click Plugins
- Click Add New Plugin
- Search for WP Mail SMTP
- Click Install
- Click Activate after installing
Configure SMTP Settings
SMTP configuration is considered a complex thing to do but in reality, it’s way much easier than you think. Just follow the steps listed below to configure it correctly in less than 5 minutes.
- Go to WordPress Dashboard
- Click WP Mail SMTP from the sidebar
- Click Launch SETUP WIZARD
- Click Let’s Get Started Button
- Choose Other SMTP
- Click Save and Continue

Next, it will take you to Configure Mail Settings. Here you will have to pay attention because everything is related to authentication and the core of sending emails. If anything goes wrong here, you will not be able to send emails.
SMTP HOST:
You have to go to your hosting provider and navigate to email settings from where you create business emails for your website. Click SETUP FOR WINDOWS DEVICE, and it will show you some of the following details. Just look for the Outgoing Server Host and copy it from there. In the case of Hostinger, as it uses TITAN EMAIL SERVICE its SMTP HOST is smtp.titan.email. But yours can be different depending on the type of service you are using.
ENCRYPTION TYPE:
You will get three different options: NONE, SSL, and TLS
Select SSL as it is the best encryption technique used to encrypt data being sent or received over the internet.
SMTP PORT:
You can find this port on the same page from where you get the Outgoing Host Server. In the case of HOSTINGER, it’s 465 but yours may vary.
Auto TLS:
Enable Auto TLS if you have selected SSL as the encryption method.
AUTHENTICATION:
SMTP Username: This username is the email you have created to get messages about form submission. For Example: info@example.com, support@example.com, or autoreply@example.com
SMTP Password: Mostly your email password is the same as the SMTP password, but sometimes, it may be different. You will get an SMTP Password from the same screen from where you get the Host Name.
FROM NAME:
Enter the name from which you want to receive or send emails. It will be displayed on the top of the email above the Subject line. It can be your website name, your own name, or any word you like.
FROM EMAIL:
Enter the email that you have created. For example info@example.com, support@example.com, or autoreply@example.com but keep in mind, it should be linked to your domain. If you use any other email it will not work. If your website is only EXAMPLE.COM then your emails will work.
Click Save and Continue
After doing these steps carefully, just click SAVE AND CONTINUE and your SMTP will be configured. In the last step, enter your admin email on which you want to receive any notifications like weekly email reports or error reports.
Test the form and Email
After completing everything above, your form should work properly. To test the form, go to the page where you have embedded the form fill out the details then click submit. It should send a form response in your email.
Frequently Asked Questions
How do I find the SMTP server for my email?
You can SMTP server host by logging into your hosting provider or Email Service provider. Then navigate to configure a desktop application. And look for an outgoing server host, this is what you are looking for.
Do we still use SMTP?
Yes, We do. The default email sender function of PHP which is mail() can be used to send email but it’s not secure and reliable. That is why we use SMTP so our emails can be delivered without any delay.


